How to Tighten Washing Machine Drum: A Guide to Silencing the Agitation
Have you ever experienced your washing machine shaking violently and moving around during a cycle? Or maybe you’ve noticed loud banging noises coming from your machine? These are all signs that your washing machine drum may be loose and in need of tightening.
Not only is a loose drum noisy and annoying, but it can also cause damage to the machine’s internal components over time. Tightening the drum bolts is an easy maintenance task that can prevent costly repairs down the road.

The process of tightening a washing machine drum involves a few simple steps. First, you’ll need to gather some tools and prepare the machine for maintenance by turning off the power supply and draining any remaining water. Next, you’ll access the drum by removing either the top cover or the front panel of your machine.
Once you have access to the drum, identify which bolts need tightening and use a wrench to tighten them. Reassemble your machine, turn it on, run a test cycle to ensure proper balance, and enjoy peace of mind knowing that your washing machine is running smoothly again!
Tools needed
List of necessary tools
Before tightening the washing machine drum, there are a few tools you will need to have on hand. Here is a list of the essential items:
- A wrench – This is a tool used for tightening and loosening bolts. It comes in different sizes, so make sure you have one that fits the bolts on your washing machine.
- Screwdriver – You may need a screwdriver to remove screws holding the top cover or front panel in place. – Pliers – In case some bolts are difficult to reach with the wrench, you can use pliers to hold them while turning them with another tool.
Each Tool’s Purpose
The wrench is perhaps the most important tool for tightening the washing machine drum. It allows you to easily turn bolts and nuts that hold the drum in place.
Make sure to choose a wrench that fits your particular model of washing machine, as different brands and models may have different bolt sizes. The screwdriver is another essential tool as it helps remove screws that hold parts in place.
Depending on your washing machine brand, these screws may be located on either the front panel or the top cover of your machine. Pliers come in handy when securing loose bolts while using a wrench.
They also help grip tight spaces where fingers may not fit properly. Ensure you choose pliers with comfortable handles for an easy grip while using it during this process.
Preparation
Turning off the power supply
Before you start tightening the drum bolts, make sure to turn off the power supply of your washing machine. This is important because it ensures your safety while working on the machine. Depending on your washing machine model, there are different methods to turn off the power supply.
Some machines have a dedicated switch to turn off the power, while others require you to unplug it from the socket. If you are unsure about how to do this, consult your owner’s manual or contact a professional.
Draining any remaining water from the machine
After turning off the power supply, you need to drain any remaining water from your washing machine before starting work. You can easily do this by locating and removing the drainage hose at the back of your machine and placing it in a bucket or sink.
Make sure that there is no water flowing through before proceeding with drum tightening. It is also a good idea to inspect inside of the drainage hose for any blockages or foreign objects that could cause problems down the line.
Preparing your washing machine before drum tightening takes only a few minutes but ensures safety and prevents any damage caused by residual water in the system. By following these simple steps, you will be able to tighten up those loose bolts with ease!
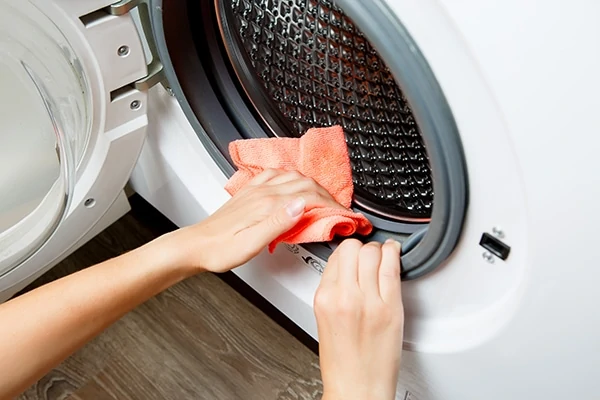
Accessing the Drum
Removing the Top Cover or Front Panel
To access the drum, you first need to remove either the top cover or front panel of the washing machine. The exact method for doing this will depend on your specific model, but most machines have a few screws or clips holding it in place.
You’ll want to consult your owner’s manual for detailed instructions on how to remove the cover or panel. If you no longer have access to your manual, you may be able to find instructions online.
Locating and Accessing the Drum
Once you have removed the cover or panel, you should be able to see the washing machine drum. It will be located towards the back of the machine and will likely be made of metal.
If you’re having trouble locating it, try spinning the washing machine drum manually – it should move freely and make a whirring sound as it spins. Next, take a look at where the drum is held in place – there should be several bolts securing it in place.
These are what we’ll be tightening later on in order to secure your washing machine drum. Be sure to take note of their location so that you can easily find them again once it’s time to tighten them up!
Tightening the drum bolts
Identifying which bolts need tightening
The first step in tightening a washing machine drum is to identify which bolts need tightening. This is crucial because not all bolts on the drum may be loose, and tightening the wrong ones can cause more harm than good.
Usually, there are four to six bolts around the perimeter of the drum that hold it in place. Use a flashlight to inspect each bolt carefully and look for any signs of looseness.
Using a wrench to tighten each bolt
Once you have identified which bolts need tightening, it’s time to get your tools ready. You will need an adjustable wrench or socket wrench that fits the size of your drum bolts.
Using a wrench that is too small or too big can cause damage to both the bolt and your tool. Start by placing your wrench on one of the loose bolts and turn it clockwise until it feels tight.
Be careful not to overtighten, as this can damage the threads on both the bolt and washer. Tighten each bolt individually until they are all snug, but not overly tight.
If you come across any stripped or damaged bolts during this process, replace them immediately with new ones from your local hardware store. It’s better to take care of these issues now than risk causing further damage down the line.
Identifying and tightening loose washing machine drum bolts is a simple task that can help extend the life of your machine. By following these steps carefully, you’ll ensure that your washing machine operates smoothly and efficiently for years to come!
Checking for Balance
Once you’ve tightened all the bolts and put everything back in place, it’s time to check if the washing machine drum is balanced properly. A poorly balanced drum can cause a lot of vibration during operation, which can damage your machine or even cause it to move around or make loud noises.
Checking for balance is easy – just open the lid or door and look inside. If everything looks good, you’re ready to move on to the next step.
Reassembling the Machine and Turning it On
Now that you’ve checked for balance, it’s time to reassemble your washing machine. Make sure you’ve put everything back in its proper place and that all screws are tightened securely. Once you’re done, turn on the power supply and make sure that all buttons are working properly.
Running a Test Cycle to Ensure Proper Balance
It’s time to run a test cycle to ensure proper balance. Start by filling up your washing machine with some clothes (not too many) and some water (not too much).
Then turn on your machine on a spin cycle. Keep an eye out for any unusual sounds or vibrations coming from your machine – if everything seems normal, then congratulations!
You have successfully tightened your washing machine drum. If not, check again if there are any loose bolts remaining or problems with other components of the washer.
Remember that keeping an eye on the tightness of your drum bolts will ensure optimal performance and avoid costly repairs down the line. By following these simple steps, tightening up your washing machine drum will be as easy as pie!
Additional Tips and Tricks
How often to check for tightness
Now that you’ve successfully tightened your washing machine drum, you might be wondering how often you should check it. The answer depends on how frequently you use your washing machine.
If you do multiple loads of laundry every day, it’s a good idea to check the drum bolts every three months. For those who use their machines less frequently, once or twice per year should suffice.
Signs that indicate loose drum bolts
It’s important to keep an eye out for signs that your washing machine drum bolts may be loose again. One of the most common indicators is unusual vibrations during the spin cycle. This could mean that the drum is off-balance because its bolts have come loose again.
Additionally, strange noises emitting from the machine during operation can also be an indicator of loose bolts. Don’t wait until these signs appear before checking your machine, as catching and tightening loose bolts early can prevent bigger problems down the road!
Conclusion
The Importance of Tight Washing Machine Drums
Having a tight washing machine drum is crucial for the longevity of your machine. Loose drum bolts can cause unnecessary wear and tear on the motor, causing it to burn out faster. A wobbling machine can also be dangerous in the home, causing accidents or even damaging your flooring.
How Easy it is to Do with This Guide
While tightening the drum bolts may seem like a daunting task, this guide has shown just how easy it can be. With the right tools and preparation, anyone can tighten their washing machine drum without needing to call in a professional.
Final Thoughts
By following this guide and regularly checking for loose bolts, you can ensure that your washing machine will last longer and function properly for years to come. Don’t let loose bolts go unnoticed – take action today and protect your investment! Remember, regular maintenance saves you money in the long run.

About Author
Thomas Henry is a passionate writer when it comes to appliances. With years of experience in the field, Thomas loves to explore the latest trends and technologies related to home appliances. He enjoys sharing his knowledge and insights with readers and is dedicated to helping them make informed purchasing decisions.